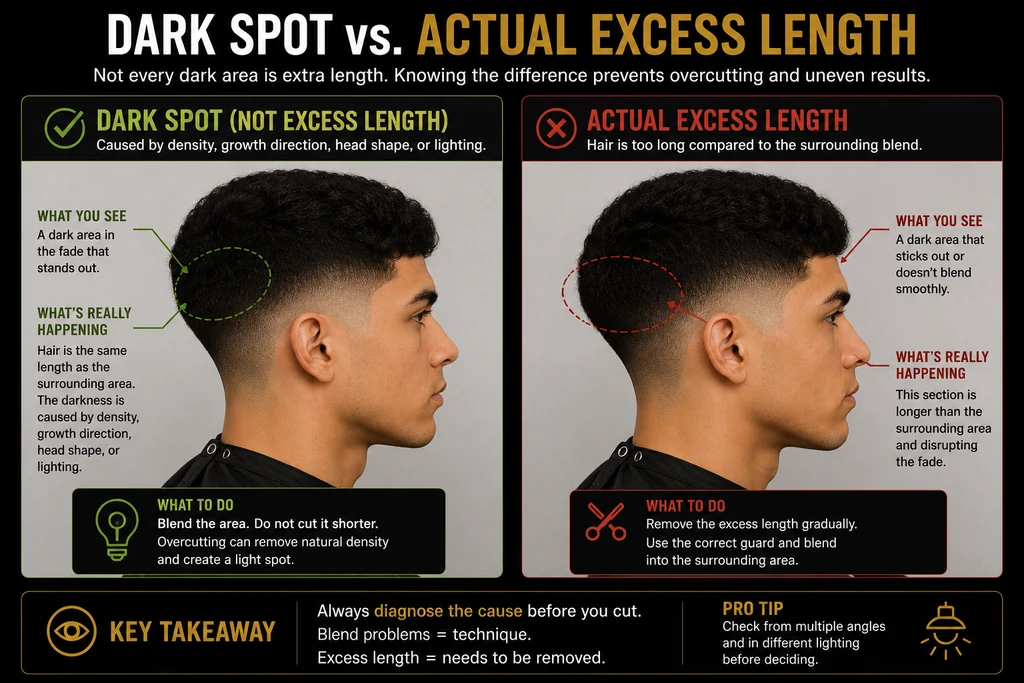
First: not every dark spot needs to be removed
This distinction is important.
A dark spot can be caused by:
- Hair that is actually longer
- Greater hair density
- A change in growth direction
- A dip in the head
- Lighting
- Loose clippings
- A transition that hasn’t been completely blended
 View full size
If you assume every dark area contains too much hair, you’ll eventually create holes.
Why it matters
Diagnosis comes before correction.
Brush the area clean
Before changing guards, remove loose clippings.
Brush or comb the hair into its natural position and then against the growth where appropriate so you can see how the density changes.
Sometimes the “problem” disappears immediately.
Change your viewing angle
Look straight at the area.
Then move toward the front and rear.
If possible, slightly rotate the client relative to your light source.
If the darkness moves or changes significantly, lighting or head contour may be contributing to what you see.
If the dark spot remains consistent and you can see or feel additional length, it is more likely something you can address with your cutting technique.
Identify where the excess length sits
Don’t simply ask:
“What guard makes this shorter?”
Ask:
“What two lengths am I trying to connect?”
That question leads to a much more controlled correction.
Use the appropriate intermediate guard, lever position, or blending technique to bridge those lengths.
Exact guard systems vary between clipper brands, so the principle matters more than one rigid formula.
Use the corner for small areas
When the problem is localized, using the entire blade can remove hair from areas that were already blended correctly.
When appropriate, use the corner of the blade and a light touch to target the specific area.
- Make a few passes.
- Brush.
- Look again.
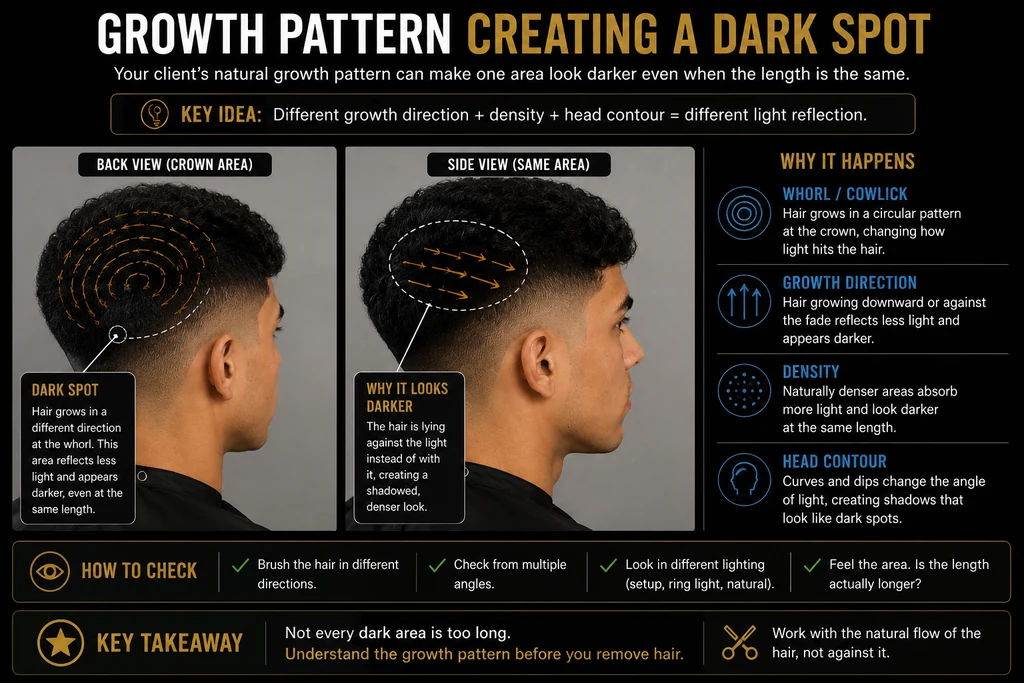
Work with the growth pattern
If hair changes direction, approach it from the direction that allows your tool to actually engage the hair.
 View full size
You may need to comb the section out or approach it from more than one direction.
Don’t repeatedly attack the same spot from one angle if the hair is lying away from the blade.
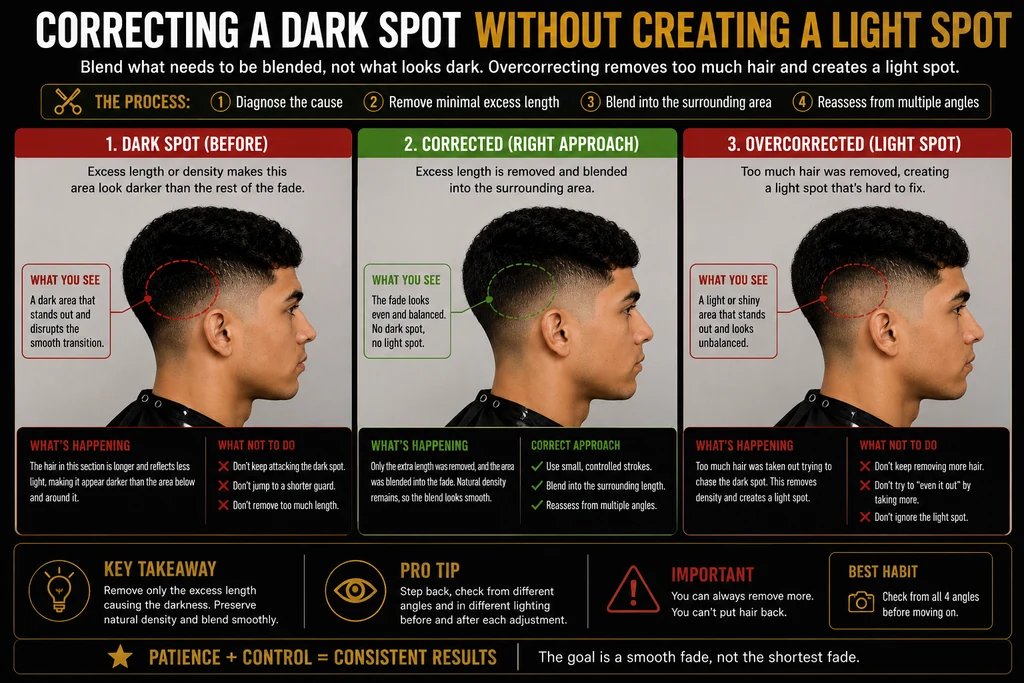
Know when to stop
This is one of the most important barber skills.
If you’ve shortened the area and it still looks darker but feels consistent with the surrounding hair, consider density and head shape.
A fade doesn’t need to look like a perfectly smooth digital gradient to be technically strong.
You’re cutting human hair on a three-dimensional head.
 View full size
Dark spot vs. weight line
A weight line typically appears as a more continuous band of excess weight.
A dark spot is more localized.
The diagnostic process overlaps:
- Brush
- Inspect
- Identify surrounding lengths
- Start conservatively
- Correct locally
- Reassess
If the darkness extends across a larger horizontal section, review the weight-line guide as well.
Key takeaway
- Don’t treat darkness as proof that hair needs to come off.
- Confirm the cause first.
- When a dark spot is genuinely caused by excess length, correct it with a controlled intermediate setting, target only the area that needs work, and stop frequently to reassess.
Frequently asked questions
What causes dark spots in a fade?
Dark spots can result from excess length, density, growth direction, head shape, lighting, loose hair, or an unfinished transition.
Should I use a shorter guard on a dark spot?
Not automatically. First identify the lengths surrounding the spot. A shorter guard may create a light patch if the darkness is caused by density or head shape rather than excess length.
Why won’t a dark spot disappear?
If repeated cutting doesn’t change its appearance as expected, reassess the area. Natural density, a growth pattern, a recessed portion of the head, or lighting may be responsible.
How do I fix a small dark area without changing the whole fade?
When appropriate, use a precise portion of the blade, light pressure, and the guard or lever position that bridges the surrounding lengths. Work locally instead of reopening the entire section.